
Wisdom teeth removal is one of the most frequently performed outpatient surgical operations in modern oral and maxillofacial healthcare, undergoing extraction in approximately 85 percent of adults during their late teens or twenties. Known clinically as the third molars, these large grinding teeth emerge at the very back of the dental arch, frequently arriving when the jawbone has already finalized its developmental dimensions. When the jaw cannot accommodate their arrival, wisdom teeth become impacted, angled into neighboring root structures, or encased under dense cortical bone and gingival tissue.
Clinical Takeaways for Wisdom Teeth Surgery
- Third molar extractions resolve acute impaction, prevent severe periodontal pockets on adjacent second molars, and eliminate recurrent pericoronitis infections.
- The critical period for blood clot retention occurs during the initial 72 hours, where avoiding negative intraoral pressure prevents painful alveolar osteitis (dry socket).
- Peak postoperative edema (facial swelling) and trismus (jaw stiffness) naturally culminate between hours 48 and 72 before progressively resolving.
- Modern multimodal pain management utilizing staggered ibuprofen and acetaminophen provides equal or superior analgesic relief compared to routine opioid prescriptions without systemic side effects.
- Comprehensive pre-operative diagnostics including 3D Cone Beam Computed Tomography (CBCT) identify precise distances to the inferior alveolar nerve canal, enabling conservative options like coronectomy when anatomical risks are elevated.
What Are Wisdom Teeth and Why Do They Require Removal?
Third molars represent an evolutionary vestige inherited from our early ancestors, who subsisted on an abrasive diet of coarse, raw roots, fibrous game, tough plants, and unrefined grains. Those prehistoric diets demanded significant masticatory muscle force and a broad dental arch capable of accommodating twelve robust molars. As human diets evolved toward cooked, softer foods through agriculture and modern culinary processing, natural selection gradually favored a more compact facial architecture and smaller mandibular dimensions. Consequently, modern humans regularly possess the genetic blueprint to develop 32 adult teeth while having room in the dental arch for only 28.
Third molars typically begin forming crown enamel inside the jawbone around age nine or ten, with root development progressing through adolescence until crown eruption attempts emerge between ages 17 and 25. Because this life stage coincides with the transition into adulthood and higher education, folk tradition historically christened them wisdom teeth. When space is insufficient, the tooth erupts along an abnormal path of least resistance or remains entirely trapped beneath bone and gum tissue.
Dentists and oral surgeons advocate for prophylactic or therapeutic removal when third molars threaten surrounding oral structures. Leaving compromised wisdom teeth in place can initiate a cascade of chronic oral pathologies:
- Pericoronitis: When a lower third molar partially erupts through the gingiva, a persistent flap of gum tissue called an operculum remains draped over the occlusal surface. Food debris, desquamated epithelial cells, and oral bacteria migrate beneath this flap, where standard brushing cannot reach. The resulting acute bacterial infection produces throbbing local pain, foul taste, severe halitosis, difficulty swallowing, and progressive jaw lock.
- Second Molar Root Resorption: An impacted third molar angled forward often presses directly against the roots of the vital adjacent second molar. Chronic pressure triggers osteoclast activation that resorbs the protective cementum and dentin of the second molar root, frequently resulting in the tragic loss of both teeth.
- Odontogenic Cysts and Tumors: Every unerupted tooth develops inside a fluid-filled sac known as the dental follicle. If the tooth fails to erupt, this follicle can slowly expand into a dentigerous cyst, eroding surrounding jawbone, loosening adjacent teeth, and expanding into the mandibular nerve canal. In rare cases, the epithelial lining can transform into benign yet destructive neoplasms such as ameloblastomas.
- Severe Periodontal Bone Loss: The narrow shelf of bone separating an impacted third molar from the second molar frequently develops deep, untreatable infrabony periodontal pockets harboring anaerobic pathobionts that silently destroy the anchoring bone of the entire quadrant.
- Orthodontic Relapse and Arch Crowding: While systemic late mandibular growth contributes to incisor crowding, the chronic pressure vector of mesially impacted lower molars can destabilize delicate cosmetic orthodontic alignment.
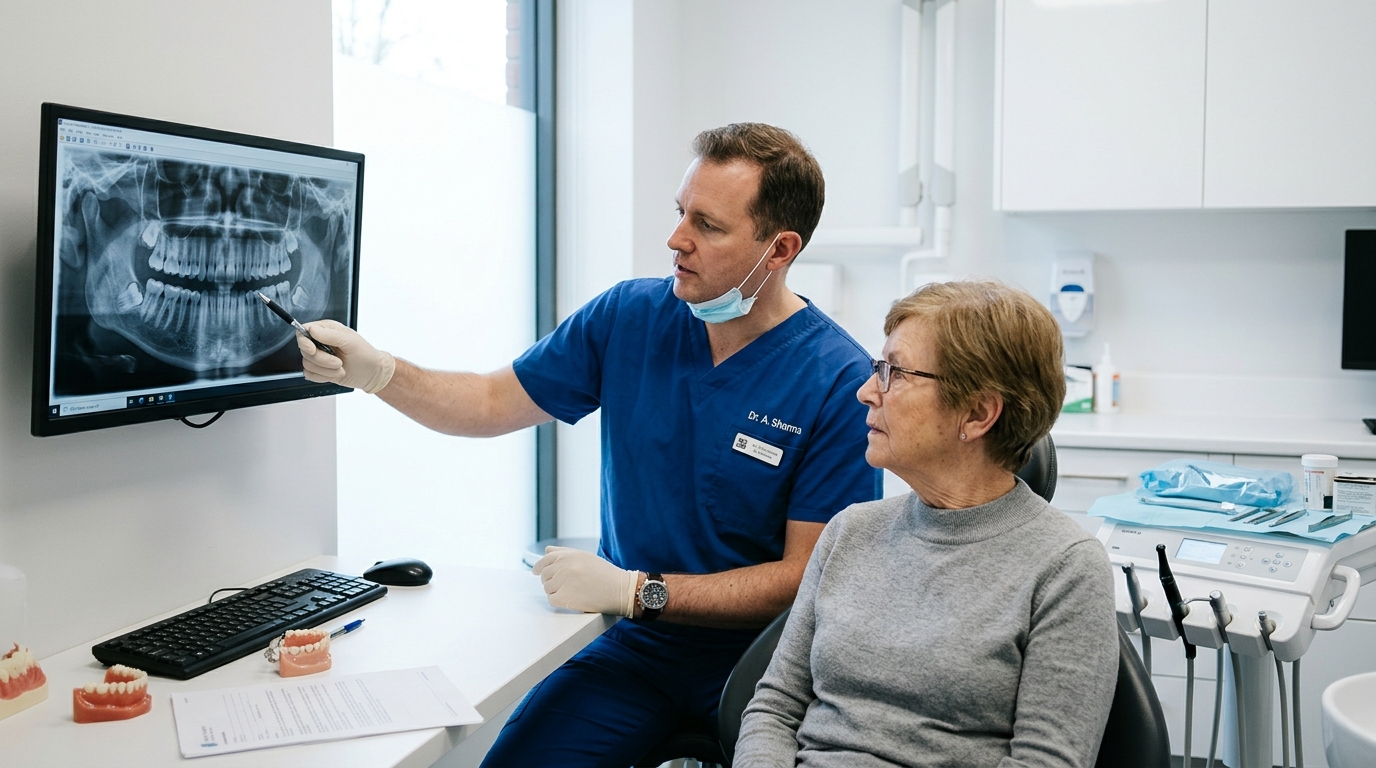
Types and Angulations of Wisdom Tooth Impaction
The complexity of an extraction procedure, surgical fees, recovery duration, and anesthesia requirements directly hinge upon the anatomical classification of the impaction. Oral surgeons categorize third molars based on tissue coverage and spatial inclination within the alveolar bone.
Classifications by Tissue Coverage
The depth to which a third molar is anchored inside surrounding tissue dictates whether the extraction is classified as a simple routine dental extraction or a complex surgical intervention:
- Erupted Third Molar: The tooth has successfully pushed through both the jawbone and the oral mucosa into the dental arch. While it may suffer from cavities or impinge upon the cheek due to malposition, it can typically be elevated and extracted using conventional dental forceps without extensive surgical incisions.
- Soft Tissue Impaction: The crown of the tooth has penetrated the crestal bone of the jaw, but remains partially or fully submerged beneath dense fibrous gingiva. The surgeon must make a surgical incision to elevate a mucoperiosteal flap before the tooth can be luxated and removed.
- Partial Bony Impaction: The tooth has erupted partially out of the jawbone, but a substantial portion of the crown or root system is still encased within cortical bone. The surgeon must reflect the gingival tissue and delicately remove surrounding bone with a surgical handpiece while sectioning the tooth into fragments to facilitate removal.
- Complete Bony Impaction: The tooth is completely entombed within the dense bone of the mandible or maxilla. The crown has not penetrated osseous boundaries, requiring extensive bone guttering, multi-piece tooth sectioning, and meticulous socket debridement.
Classifications by Spatial Angulation
The axial orientation of the crown relative to the long axis of the adjacent second molar determines the mechanical resistance encountered during delivery:
- Mesioangular Impaction: The crown is tilted forward at an angle toward the front of the mouth, leaning directly against the distal cervical neck of the second molar. This is the most prevalent form of impaction, accounting for roughly 45 percent of all impacted lower third molars.
- Vertical Impaction: The tooth stands upright in a relatively normal vertical orientation, but fails to erupt fully due to dense overlying bone, inadequate space within the anterior border of the mandibular ramus, or thick fibrous mucosal tissue.
- Horizontal Impaction: The tooth lies entirely flat on its side at a 90-degree perpendicular angle to the second molar. The crown burrows directly into the cervical root zone of the adjacent tooth, while its roots point backward toward the jaw hinge. This variation requires specialized tooth sectioning to remove safely without compromising neighboring bone.
- Distoangular Impaction: The crown tilts backward toward the mandibular ramus or the maxillary tuberosity. Though less frequent, distoangular lower impactions can be technically challenging because the path of surgical withdrawal points directly into dense ascending ramus bone.
Surgical Procedure and Anesthesia Options
Modern oral surgery combines precision surgical methods with tailored anesthesia to guarantee total patient comfort throughout the procedure. Understanding how anesthesia modalities operate alleviates anticipatory anxiety and ensures appropriate pre-operative fasting preparation.
Anesthesia Protocols
Surgical extraction can be conducted under several anesthetic tiers depending on procedural complexity, medical history, and patient comfort preferences:
- Local Anesthesia: Profound local blockade is achieved using medications like lidocaine, articaine, or bupivacaine combined with dilute epinephrine to temporarily silence regional sensory nerve transmission and restrict surgical bleeding. The patient remains completely conscious and alert, perceiving pressure, vibration, and tactile movements without experiencing sharp pain.
- Nitrous Oxide Inhalation (Laughing Gas): Administered through a lightweight nasal mask alongside supplemental oxygen, nitrous oxide induces mild conscious euphoria and relaxation while elevating the personal pain threshold. It takes effect within minutes and leaves the system rapidly, enabling adult patients to drive themselves home following minor procedures.
- Intravenous (IV) Moderate Sedation: Frequently termed twilight sleep, this technique delivers sedative and analgesic medications such as midazolam and fentanyl directly into the bloodstream through a peripheral catheter. Patients enter a deeply tranquil, relaxed twilight state where they maintain spontaneous breathing and verbal responsiveness to gentle prompts, yet retain little to no conscious recall of the surgical events.
- General Anesthesia: Reserved for exceptionally intricate full-bony impactions, deep facial trauma reconstructions, or extreme dental phobias, general anesthesia produces complete unconsciousness with comprehensive cardiovascular monitoring administered by a board-certified dental anesthesiologist or medical anesthesia team.
The Surgical Step-by-Step Workflow
Once profound anesthesia has been confirmed through sensory testing, the oral surgeon initiates a systematic sequence designed to remove the tooth while conserving maximal natural jawbone:
- Incision and Flap Elevation: A precise scalpel incision is placed along the gingival margin and extended into the retromolar space. A periosteal elevator reflects the gingival tissue and underlying periosteum outward, exposing the cortical bone surrounding the third molar.
- Osteotomy (Bone Troughing): Using an electric or air-driven surgical handpiece that exhausts sterile saline irrigation rather than air, the surgeon gently removes a narrow trough of bone around the perimeter of the crown to create clearance.
- Odontotomy (Tooth Sectioning): Rather than extracting a convoluted or horizontally angled tooth as a single large unit which could fracture neighboring bone or compress the nerve canal, the surgeon uses a high-speed surgical carbide bur to cleanly segment the crown and roots into smaller manageable geometric pieces.
- Fragment Delivery and Socket Curettage: Surgical elevators sequentially luxate each section out of the socket. The surgeon inspects the empty socket, meticulously curettes out any remnants of the fibrous dental follicle or cystic tissue, and rounds down any sharp bony spurs.
- Saline Irrigation and Closure: The socket undergoes copious high-pressure irrigation with sterile saline to flush out microscopic bone shavings and particulate matter. The mucoperiosteal flap is re-approximated and secured using resorbable chromic gut or vicryl sutures that dissolve on their own within one to two weeks.
The Critical First 24 Hours: Hour-by-Hour Recovery Protocol
The initial 24 hours following third molar surgery represent the most pivotal window in the entire recovery continuum. The biological foundation of all healing depends upon the formation and mechanical stabilization of a dense fibrin blood clot inside the alveolar socket. How a patient manages this initial phase directly dictates their comfort, bleeding trajectory, and freedom from post-surgical complications.
Hours 0 to 2: Immediate Post-Operative Hemostasis and Protection
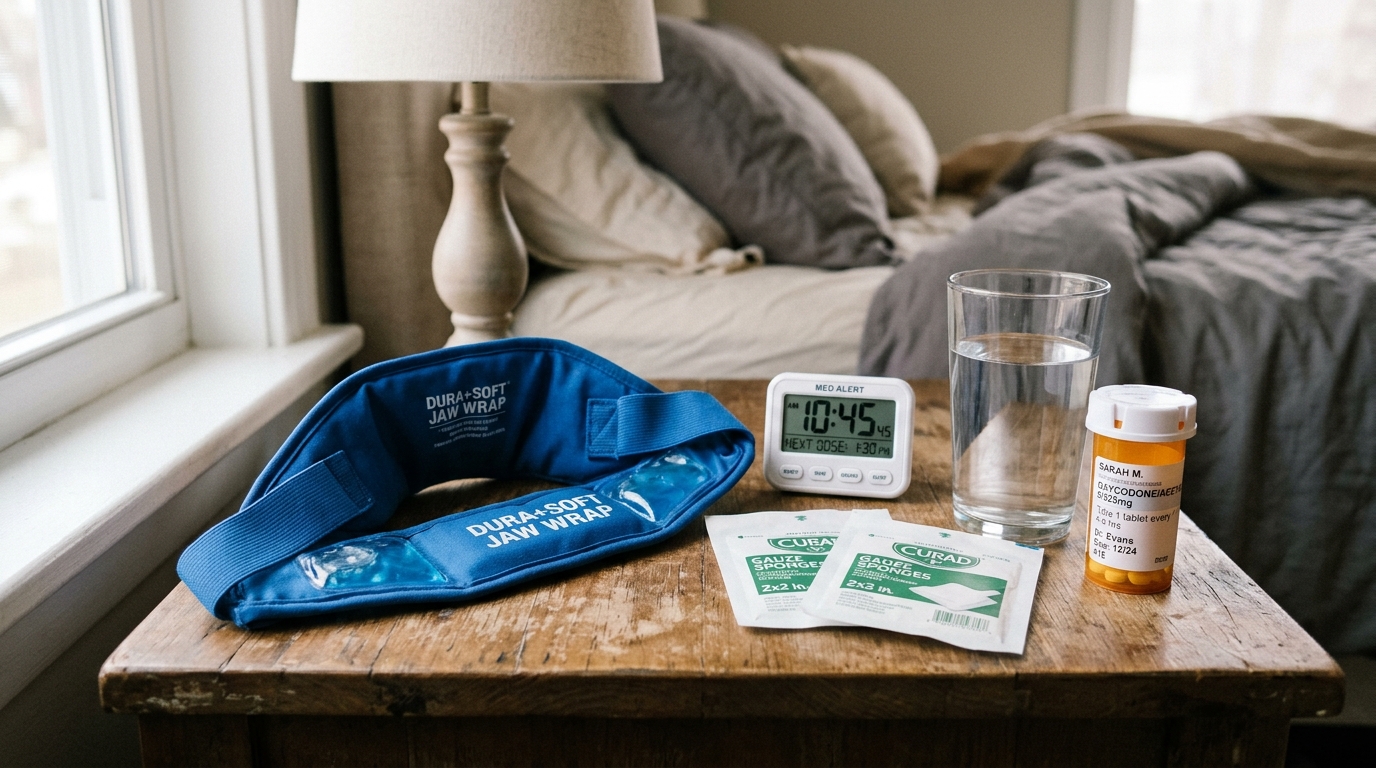
Immediately following the procedure, sterile woven gauze pads are folded into firm compact squares and positioned directly over the fresh extraction sites. The patient must maintain steady, firm biting pressure without chewing or talking. This continuous pressure compresses severed capillary beds and initiates the primary clotting cascade. During these initial hours, local anesthesia remains fully active. Patients must be careful not to bite their numb tongue, inner cheeks, or lips, which can cause significant traumatic tissue damage.
Hours 2 to 6: Managing Residual Oozing and Swelling Prevention
It is entirely normal for saliva to look pink or blood-tinged for the first 24 to 48 hours. A small trickle of blood mixing with a mouth full of saliva often appears far more alarming than it actually is. Gauze should be changed every 45 to 60 minutes only if active bleeding continues. Once gauze comes away with mild pink stains rather than saturated dark red clots, further gauze packing should cease, as dry gauze can inadvertently pull fresh clots out of the socket upon removal.
If persistent, bright red oozing continues past the third hour despite firm pressure, utilize the damp black tea bag technique. Moisten an ordinary black tea bag in lukewarm water, squeeze out excess liquid, wrap it in a thin layer of sterile gauze, and bite down firmly for 45 minutes. Black tea contains high concentrations of natural tannic acid, a powerful organic astringent that contracts capillary walls, stimulates local vasoconstriction, and promotes rapid hemostasis far faster than cotton gauze alone.
Simultaneously, begin cold compress therapy. Position an ice pack or a dedicated jaw wrap with gel inserts against the exterior cheeks for 20 minutes on, followed by 20 minutes off. Intermittent cold exposure induces superficial vasoconstriction, substantially mitigating the inflammatory cellular migration that causes facial edema.
Hours 6 to 12: Initiating Multimodal Pain Management
Do not wait for local anesthetic numbness to vanish completely before taking prescribed or recommended analgesics. As the sensory blockade fades, nociceptive pain signals rapidly amplify if pain pathways are not pre-emptively buffered. Clinical research in modern dental pharmacology demonstrates that a multimodal analgesic strategy combining ibuprofen (an anti-inflammatory NSAID) with acetaminophen (a central analgesic) delivers pain relief superior to codeine or hydrocodone combinations, without nausea, dizziness, or addiction risks.
Under professional dental guidance, a standard non-narcotic schedule involves alternating 600 milligrams of ibuprofen with 500 to 1,000 milligrams of acetaminophen every three to four hours. Ibuprofen directly suppresses peripheral cyclooxygenase enzymes that synthesize pro-inflammatory prostaglandins at the surgical site, while acetaminophen modulates central nervous system pain perception pathways. Always ingest oral medications with a few tablespoons of cool, smooth liquid food like yogurt or applesauce to shield gastric mucosa from irritation.
Hours 12 to 24: Evening Settling and Sleep Ergonomics
When preparing for night rest, sleep ergonomics play an overlooked role in controlling nocturnal throbbing. Patients must never lie completely flat on their back or side. Resting horizontally elevates venous pressure within the head and neck, intensifying microvascular throbbing at the mandibular extraction sites and dislodging fresh clots. Prop the head and torso up at a 45-degree angle using two or three firm pillows or a wedge cushion. Place a soft towel over the pillow to absorb minor salivary oozing that may escape overnight.
| Post-Op Window | Primary Biological Objective | Clinical Care Actions | Strict Restrictions to Obey |
|---|---|---|---|
| Hours 0 to 4 | Primary blood clot stabilization | Maintain continuous biting pressure on sterile gauze; change every 45 mins until active bleeding ceases. | No talking, no chewing, no spitting, no drinking through straws. |
| Hours 4 to 12 | Suppression of early inflammation and edema | Intermittent cold pack on jaw (20 mins on / 20 mins off); initiate multimodal ibuprofen and acetaminophen. | No warm food, no hot liquids, no rigorous mouth washing. |
| Hours 12 to 24 | Nocturnal hemostasis and vascular stabilization | Sleep elevated at 45 degrees; consume cool pureed foods; stay hydrated with small, gentle sips of water. | No lying flat, no smoking, no vaping, no alcohol consumption. |
| Days 2 to 3 | Granulation tissue formation and peak swelling control | Transition to moist warm heat packs on Day 3; begin gentle warm salt water mouth baths after meals. | No vigorous swishing or forceful spitting; avoid strenuous exercise. |
| Days 4 to 7 | Soft tissue contraction and debris clearance | Begin gentle curved plastic syringe irrigation with warm saline if instructed; progress to soft chewing foods. | No hard, crunchy, or seedy foods (popcorn, chips, berries). |
| Weeks 2 to 4 | Secondary mucosal closure and osteoid deposition | Resume normal gentle brushing and flossing; soft tissue completes surface closure over the bony depression. | Do not probe the healing socket indentations with fingers, toothpicks, or sharp utensils. |
Day-by-Day Recovery Timeline and Healing Milestones
Recovery from third molar surgery occurs in progressive biological phases, transitioning from fragile hemostasis to vibrant granulation tissue, mucosal bridging, and eventual osteogenic bone regeneration.
Days 2 and 3: The Peak Swelling and Trismus Phase
Patients often mistakenly anticipate that the day of surgery will be the most uncomfortable. In clinical reality, surgical swelling (edema) reaches its maximum physiological peak between 48 and 72 hours following the operation. Histamines, bradykinins, and inflammatory white blood cells naturally pool in the facial fascial planes, leading to chipmunk cheeks. Mild trismus, or difficulty opening the jaw wider than an inch, is standard as the masseter and temporalis muscles respond to proximity trauma.
After completing 48 hours of cold compress therapy, switch on morning of Day 3 to moist warm heat. Apply a warm, damp washcloth, a heating pad set to low, or warm hot water bottles to the exterior cheeks for 20 minutes at a time. Warmth expands local blood vessels, accelerating lymphatic clearance of pooled inflammatory fluid, reducing bruising discoloration, and soothing tense jaw muscles.
Day 2 also marks the commencement of warm salt water mouth rinses. Dissolve one-half teaspoon of standard table salt into eight ounces of lukewarm water. Take a mouthful and gently tilt your head from side to side, letting the liquid passively bathe the surgical sites before leaning over the sink and letting it fall out without spitting. Never rinse aggressively, swish with force, or spit with pressure, as hydraulic force can dislodge the stabilizing clot.
Days 4 to 7: The Turning Point and Debris Management
By Day 4, systemic inflammation rapidly subsides. Facial swelling begins to diminish, and jaw mobility progressively expands. Bruising along the jawline or extending downward into the neck may transition through shades of blue, green, and yellow as subcutaneous blood breaks down and gets reabsorbed by the body.
Surgical stitches placed during the procedure typically loosen and dissolve between Days 4 and 10. You may notice tiny pieces of thread coming loose on your tongue; this is a normal occurrence and does not indicate the surgical incision is reopening.
If your oral surgeon provided a curved plastic irrigation syringe, Day 5 or 6 is typically the designated time to start gentle socket irrigation. Fill the syringe with lukewarm tap water or warm salt water, gently position the curved plastic tip just above the opening of the lower socket, and slowly depress the plunger to flush out trapped food debris after meals. Never jam the tip directly down into the socket cavity.
Weeks 2 to 4: Soft Tissue Closure
Between 14 and 28 days post-surgery, new epithelial tissue completely covers the surface of the extraction wound. While a noticeable hollow or indentation remains palpable to the tongue, the underlying fragile nerve endings are now protected beneath a resilient layer of keratinized oral mucosa. You can comfortably resume standard cardiovascular exercise, full-contact athletics, and an unrestricted healthy diet.
Months 3 to 6: Complete Osseous Regeneration
While the gums close within weeks, true bone regeneration within the deep hollow of the alveolar socket is a slow physiological process. Specialized osteoblast cells systematically replace the initial woven osteoid collagen matrix with mature, dense lamellar bone over three to six months. By six months, the extraction site is indistinguishable on dental X-rays from surrounding jaw architecture.
Dry Socket (Alveolar Osteitis): Biology, Symptoms, and Real Treatment
Among all potential post-extraction complications, alveolar osteitis, commonly termed dry socket, is the most dreaded. Occurring in approximately 2 to 5 percent of standard extractions and up to 25 to 30 percent of impacted lower third molar surgeries, dry socket is a painful condition that warrants clear biological understanding rather than mystery.
The Pathophysiology of Dry Socket
When a tooth is removed, the socket immediately fills with blood, which coagulates into a biological plug composed of cross-linked fibrin fibers and platelets. This clot acts as an organic bandage, sealing off the bare interior cortical bone of the tooth socket (the lamina dura) and insulating the sensitive sensory nerve endings within the bone from the oral cavity. Fibroblasts and capillaries normally migrate into this clot to initiate tissue repair.
In alveolar osteitis, one of two breakdowns occurs: either mechanical forces prematurely pull the clot out of the socket, or local biochemical fibrinolysis dissolves the clot prematurely before granulation tissue can form. When the clot is lost, the raw alveolar bone and microscopic nerve endings are directly exposed to air, saliva, food acids, and oral bacteria. This triggers acute localized osteitis and severe radiating neurogenic pain.
Identifying Dry Socket vs Normal Healing Pain
Distinguishing between customary postoperative soreness and a true dry socket is straightforward once you recognize the characteristic clinical presentation:
- Onset Timing: Standard surgical pain peaks within the first 48 hours and then steadily diminishes each morning. Dry socket pain typically manifests out of nowhere between postoperative Days 3 and 5, after the patient thought they were over the worst of the recovery.
- Pain Quality and Radiation: The discomfort is described as an intense, deep, throbbing ache that frequently radiates upward into the ear, jaw hinge, temple, or neck on the affected side. Standard over-the-counter pain medications provide virtually no relief.
- Visual Appearance: Upon looking into the mouth with a flashlight, an ordinary healing socket features a moist, dark red or whitish-yellow layer of healing granulation tissue. A dry socket looks visibly empty, hollow, or displays dull grayish-white exposed bone devoid of a blood clot.
- Distinctive Foul Odor and Taste: The decomposition of stagnant food particles and bacteria inside the empty bony hollow produces an unmistakable foul, sulfurous taste and persistent halitosis that brushing cannot mask.
Root Causes and High-Risk Behaviors
Dry socket is largely preventable when patients understand the physical and physiological mechanisms that compromise clot stability:
- Negative Intraoral Pressure: Sucking through a drinking straw, drawing on a cigarette or vape device, or spitting with force creates a vacuum inside the oral cavity that easily sucks a delicate clot straight out of the socket. Straws and smoking should be avoided for a minimum of 7 to 10 days.
- Chemical and Thermal Irritants: Tobacco smoke introduces carbon monoxide and nicotine into the oral mucosa, causing profound microvascular constriction that starves healing tissues of oxygen and vital clotting factors. Heated vapor from e-cigarettes dries the oral environment and accelerates fibrinolysis.
- Hormonal Estrogen Influence: Women taking oral contraceptives or undergoing estrogen therapy experience significantly higher rates of dry socket. High systemic estrogen levels elevate plasma fibrinolytic activity, prompting the body to dissolve clots prematurely. Scheduling wisdom tooth extraction during the low-estrogen phase of the menstrual cycle (Days 23 through 28) significantly decreases dry socket incidence.
- Difficult Surgical Bone Removal: Dense bone removal and extended tooth luxation release higher concentrations of tissue plasminogen activators locally, increasing fibrinolytic dissolution risk.
Clinical Treatment: Medicated Dressings
Dry socket will not cause permanent damage or systemic poisoning, but the discomfort can be debilitating without professional intervention. Attempting to treat a true dry socket at home with over-the-counter analgesics is rarely successful. If you suspect a dry socket, contact your oral surgeon immediately for a five-minute in-office treatment:
The surgeon gently flushes the socket with warm sterile saline to remove necrotic debris. They then place a specialized medicated paste or strip of iodoform gauze saturated with eugenol (pharmaceutical-grade oil of cloves), topical anesthetics, and antimicrobial compounds directly into the bare socket. Eugenol possesses potent, direct neuro-inhibitory properties that quiet inflamed bone nerves. Within 15 to 30 minutes of dressing placement, excruciating pain typically drops to a manageable mild sensation. The dressing is replaced or removed after two to three days as secondary granulation tissue covers the exposed bone walls.

Nerve Proximity and the Coronectomy Alternative
The roots of lower third molars develop in close anatomical proximity to two vital sensory nerves of the face and jaw: the inferior alveolar nerve (IAN) and the lingual nerve. Understanding this anatomy and the modern surgical techniques developed to protect it ensures informed surgical decisions.
Understanding the Nerve Pathways
The inferior alveolar nerve is a primary branch of the mandibular division of the trigeminal nerve. It travels through the core of the lower jawbone inside a protected bony tunnel known as the mandibular canal, supplying sensory feeling to the lower teeth, lower lip, and chin. In many young adults, the developing root tips of impacted wisdom teeth sit directly against, wrap around, or penetrate this bony canal.
The lingual nerve runs along the inner lingual shelf of bone in the soft tissue of the floor of the mouth, providing sensory touch and taste to the anterior two-thirds of the tongue and inner gum tissue. If either nerve is stretched, bruised, or severed during surgical elevation or bone troughing, the patient may experience temporary or, in rare cases, permanent numbness, tingling, or burning sensations (paresthesia) in the lower lip, chin, or tongue.
Advanced 3D CBCT Imaging
Standard two-dimensional panoramic X-rays often show a third molar root overlapping the dark shadow of the nerve canal, but cannot reveal whether the root is passing safely to the side of the canal or compressing it directly. Modern oral surgical practices routinely employ Cone Beam Computed Tomography (CBCT). This low-dose 3D volumetric scan produces high-resolution cross-sectional views that confirm the precise spatial relationship of the root tips to the nerve sheath in three dimensions.
Coronectomy: The Conservative Alternative
When 3D imaging demonstrates that full extraction carries an unacceptably high risk of permanently traumatizing the inferior alveolar nerve, oral surgeons can perform a coronectomy (intentional partial odontectomy). Rather than extracting the entire tooth, the surgeon cleanly sections off the crown of the third molar approximately 3 to 4 millimeters below the crest of the surrounding bone, meticulously smooths the retained root surface, and leaves the healthy, non-mobile root structures safely in place within the jawbone.
The surgical gum flap is closed securely over the roots. In the vast majority of cases, the healthy retained root fragments remain permanently dormant, becoming encased in natural bone over time without causing infection or symptoms. Studies tracking thousands of coronectomy procedures report a reduction in temporary nerve injury rates from 5 to 8 percent down to less than 0.5 percent, with zero instances of permanent nerve damage.
Nutrition and Soft Food Progression: What to Eat and What to Avoid
Maintaining adequate caloric and nutritional intake is essential for tissue synthesis, immune defense, and stable energy during recovery. However, chewing mechanics must not jeopardize delicate extraction sockets. Structuring your dietary progression through three distinct culinary phases eliminates guesswork.
Phase 1: Days 1 and 2 (Smooth Liquids and Cool Purees)
During the initial 48 hours, all food must be smooth, cool to lukewarm in temperature, and require zero chewing effort. Hot temperatures are strictly prohibited because thermal heat dilates oral blood vessels and triggers renewed bleeding. Never use a drinking straw under any circumstance; always consume liquids from an open cup or with a small spoon.
- Smooth, blended vegetable soups (butternut squash, creamy carrot, or blended potato soup served lukewarm).
- Natural Greek yogurt, skyr, or kefir (packed with protein and beneficial probiotics to support gut health if taking antibiotics).
- Smooth unsweetened applesauce and ripe fruit purees.
- Nutrient-dense protein shakes and fruit smoothies prepared without seeded fruits and consumed with a spoon.
- Soft puddings, custards, and ice cream (avoid varieties with nuts, chocolate chips, or crunchy mix-ins).
- Bone broths and vegetable broths enriched with collagen.
Phase 2: Days 3 to 5 (Soft Chewable Comfort Foods)
As inflammation resolves and the jaw begins moving comfortably, introduce soft, tender solid foods that can be gently crushed with the tongue or chewed with front teeth without placing lateral pressure on the back molars:
- Soft scrambled eggs or fluffy egg salad.
- Mashed sweet potatoes or creamy mashed Idaho potatoes with mild gravy.
- Ripe, creamy mashed avocados with a pinch of sea salt.
- Overcooked, soft pasta shapes like macaroni and cheese or small orzo.
- Warm, well-cooked oatmeal or cream of wheat.
- Silken tofu sautéed lightly with mild seasonings.
- Flaky, tender white fish (such as cod or tilapia) that flakes apart effortlessly with a fork.
- Cottage cheese and soft cheeses.
Phase 3: Days 6 to 10 (Transition to Normal Solids)
Once you reach the end of the first week, you can gradually resume standard wholesome meals, prioritizing foods that remain tender while avoiding crunchy or sharp items:
- Tender, slow-cooked shredded chicken or pulled pork.
- Steamed tender vegetables like carrots, zucchini, and broccoli florets.
- Soft rice dishes, risotto, and tender bean casseroles.
- Soft bread crusts and pancakes soaked with syrup.
Foods and Ingredients Strictly Prohibited for 14 Days
Introducing the wrong foods prematurely is one of the most common causes of secondary infections, delayed healing, and socket trauma. Steer clear of the following items for at least two weeks:
- Popcorn: Popcorn hulls are notorious for sliding under healing gum flaps and wedging deeply inside sockets, creating painful foreign-body abscesses that require surgical drainage.
- Small Seeds and Grains: Sesame seeds, poppy seeds, chia seeds, quinoa, and berry seeds effortlessly become trapped in deep socket crevices.
- Hard, Crunchy, or Sharp Items: Potato chips, tortilla chips, pretzels, crackers, and crusty baguettes have sharp edges that lacerate delicate healing tissues.
- Spicy and Acidic Foods: Hot peppers, hot sauces, citrus juices, and heavy vinegar dressings cause chemical stinging and stimulate inflammatory mucosal irritation.
- Alcoholic Beverages: Alcohol dehydrates oral tissues, interacts dangerously with pain medications, and disrupts platelet aggregation.
Wisdom Teeth Removal Cost and Insurance Guide
The total financial investment required for third molar removal varies significantly based upon the geographic location of the practice, the depth and angulation of impaction, the type of anesthesia selected, and the specifics of your insurance coverage.
Cost Breakdown by Impaction Classification
Surgeons establish procedural fees reflecting the surgical complexity, operating time, and specialized equipment required to remove each tooth:
| Impaction Classification | National Average Cost Per Tooth (Without Insurance) | Typical Out-of-Pocket Cost (With Dental Insurance) | Surgical Complexity Factors |
|---|---|---|---|
| Simple Erupted Tooth | $200 – $400 | $40 – $100 | Straightforward elevation; no incision or bone removal required. |
| Soft Tissue Impaction | $350 – $600 | $70 – $180 | Gingival flap incision and suturing necessary; minimal bone removal. |
| Partial Bony Impaction | $450 – $800 | $100 – $250 | Bone troughing with surgical handpiece and tooth sectioning required. |
| Complete Bony Impaction | $600 – $1,100 | $150 – $350 | Extensive bone removal, multi-piece sectioning, and intricate socket curettage. |
| All 4 Wisdom Teeth with IV Sedation | $2,200 – $4,500 | $500 – $1,500 | Comprehensive full-mouth extraction, IV anesthesia medications, monitoring, and 3D CBCT imaging. |
Navigating Dental and Medical Insurance Benefits
Most dental insurance plans cover between 50 and 80 percent of third molar extractions up to the annual plan maximum, which typically ranges from $1,000 to $2,000 per calendar year. If an extraction involves all four wisdom teeth under general or IV sedation, procedural costs can exceed an annual dental maximum. In these scenarios, dental offices often coordinate billing with major medical insurance plans.
When impacted third molars are deemed medically necessary due to associated pathology (such as cysts, active pericoronitis spreading into facial planes, or chronic damage to surrounding jaw structures), medical insurance plans may cover the surgical bone removal and hospital or ambulatory surgical center fees. Always request a formal pre-treatment estimate from your surgeon's billing coordinator to verify exact co-pays, deductibles, and network coverage before surgery.
Normal Symptoms vs Complications: When to Contact Your Surgeon
Recovering from third molar surgery involves predictable post-surgical inflammation. Knowing which signs reflect normal physiological healing versus those that indicate a developing clinical issue provides peace of mind.
Expected and Manageable Symptoms
The following symptoms represent customary reactions to oral surgery and should resolve steadily over the first week:
- Mild salivary oozing that tinges saliva pink for 24 to 48 hours.
- Facial swelling and cheek puffiness that peaks on Day 2 or 3 and subsides by Day 5.
- Mild jaw stiffness (trismus) that improves with warm compresses and gentle opening exercises.
- Bruising across the cheeks, lower jawline, or neck that fades through yellow and green hues.
- A slight low-grade fever under 100 degrees Fahrenheit during the first 24 hours as the immune system responds to surgical stress.
- A temporary indentation or gap in the gums where the tooth was removed.
Complication Warning Signs Requiring Prompt Attention
Contact your oral and maxillofacial surgeon's office immediately if you encounter any of the following clinical warning signs:
- Active, persistent bright red bleeding that continues filling the mouth with clots despite continuous, firm pressure on a damp black tea bag for over an hour.
- Elevated body temperature exceeding 101 degrees Fahrenheit, especially if accompanied by chills or body aches after the second postoperative day.
- Rapidly progressive facial swelling that continues expanding after Day 3 or spreads downward into the submandibular neck space.
- Difficulty swallowing liquids or breathing normally, which represents a surgical emergency known as Ludwig angina requiring immediate hospital evaluation.
- Sudden, excruciating, throbbing pain emerging between Days 3 and 5 that radiates into the ear or temple and does not respond to prescribed medications (classic dry socket).
- Persistent numbness, loss of sensation, or tingling in the lower lip, chin, or tongue that remains unchanged after 24 hours.
- Active discharge of yellowish or white pus from the extraction sockets accompanied by throbbing pain and swollen lymph nodes.
Frequently Asked Questions About Wisdom Teeth Removal
How long does pain typically last after wisdom teeth removal?
Most patients experience acute postoperative pain and soreness for 3 to 4 days, with discomfort peaking between hours 48 and 72 before steadily diminishing. By day 7, the majority of patients no longer require analgesic pain medications and can comfortably resume normal daily routines.
How can I tell if I have a dry socket or just normal healing pain?
Normal healing soreness begins immediately following surgery and gradually improves every day after day 3. In contrast, dry socket pain typically strikes unexpectedly between days 3 and 5, presenting as a severe, throbbing ache radiating toward the ear and temple, often accompanied by an empty-looking socket and a foul odor or taste.
Why is using a drinking straw strictly prohibited after wisdom tooth surgery?
Drinking through a straw creates negative pressure (suction) inside the oral cavity that can physically dislodge the delicate blood clot from the socket. Losing this blood clot leaves the underlying alveolar bone and nerve endings exposed, directly causing painful dry socket (alveolar osteitis).
When can I start eating solid foods and exercising again?
Soft chewable foods like scrambled eggs, mashed avocado, and pasta can be safely introduced between days 3 and 5 as jaw stiffness subsides. Normal solid foods can usually be resumed after day 7, though hard, crunchy, or seedy items like popcorn and chips should be avoided for 2 weeks. Light walking can resume on day 3, but vigorous cardiovascular exercise should be avoided for 5 to 7 days.
What is a coronectomy and when is it recommended over full extraction?
A coronectomy is a conservative surgical procedure where only the crown of an impacted lower wisdom tooth is removed, leaving the healthy root tips untouched in the jawbone. It is recommended when 3D CBCT scans show the roots wrapping around or directly touching the inferior alveolar nerve canal, reducing nerve damage risks from 5 percent to under 0.5 percent.
Does dental insurance or health insurance cover wisdom teeth removal?
Yes. Most dental insurance plans cover 50 to 80 percent of wisdom tooth extractions up to your annual policy limit (typically 1,000 to 2,000 dollars). If teeth are deeply impacted in bone, cause cysts, or require IV general anesthesia in a surgical setting, major medical health insurance plans may also cover a portion of the surgical fees.
Originally published and fact-checked at GeneralPedia.
